The Picture Shelves

My wife is a professional photographer. As a result, she really enjoys printing and framing her favourite photos of the family. Since moving into our new home, she has had a desire to fill the walls with prints, and has been making lots of holes in the walls doing so. Her tastes in which pictures need to be featured changes often, which results in more holes. One day, while I was browsing the DIY plans at Ana-White's website, I saw some picture shelves that were in a photo there. Showed it to my wife and that was that. She needed some. It would allow her to put up her pictures and change them and their positions without making new holes in the walls. I didn't use any plans from Ana White, but the design was simple enough that it wasn't needed.
This wouldn't be a complicated build. It was was composed of straight boards stuck together and finished with paint or stain. That should have been simple and headache free. It was not. By the end, I wanted to toss them into my fireplace.
I forgot to take photos of the process of building these, so I only have the finished shots at the bottom of this blog entry.
The build used 1x3 boards that I already had. I measured out the sizes of the shelves that my wife wanted, and cut the boards to size with the mitre saw. I would need a 1x2" for the back of the shelf, a full 1x3" for the tray and 1x1.5" for the front of the shelf. That slightly higher piece for the front would allow frames to sit leaning against the wall without sliding off the shelf. I used my table saw to rip the boards to the right sizes.
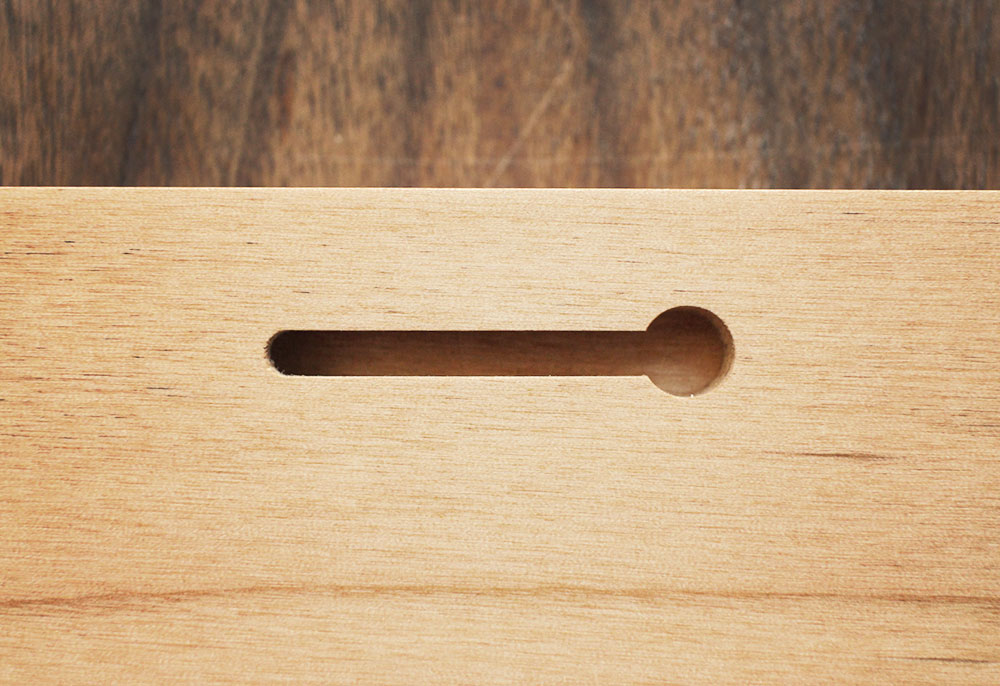
I didn't want any fasteners to be seen on these, so glue was used to hold the front strip. Glued and clamped overnight. The back was held on with glue and screws (counter-sunk). Once it was assembled, I realized that I should have routed the corners BEFORE gluing. Ugh. That's okay. I was still able to slide the shelves over the router table to round-off the edges after assembly. I kept the back corners (against the wall) sharp, and just took the sharp edge with 1/4" round over bit. I hand-sanded all the surfaces to get a clean, smooth surface. Next step was to cut key-hole slots to mount them to the wall. These are slots cut into the wood that allows a screw that is in the wall to slide into the shelf and hold it securely. My router bit set has the right bit for that. I measured the placement of the studs on the wall, and used that distance as a gauge for placing the slots on the shelves. The result were two or three long channels in the back that would hold the shelves tightly against the wall at the studs.
The last stage was the finishing. My wife wanted black stain that would not be opaque. The water-based stain I used on the Harmony Bench would work if I used it correctly (which I didn't do then). I was supposed to wipe the stain off after application. I didn't. I let it dry so it was essentially paint. I was going to use it correctly this time. However, I had run out of pre-stain conditioner. The store nearest me was Home Depot, but the selection was sparse. Many of the shelves for stains and conditioners were bare, so I asked the paint representative for advice. He showed me which one I should use and I bought it and used it on his advice. Mistake.
I didn't notice that what he had sold me was oil-based pre-stain conditioner. It was not compatible with the water-based stain that I already owned and wanted to use. I should have paid more attention to the product he recommended. My fault (and his for not checking whether I wanted oil or water based). So I had to go back and buy an oil-based stain, which I hate using. Stain needs to be wiped off, and doing so with an oil-based product super sucks. Sticky, yucky mess that is hard to clean up. So frustrating for something that was supposed to be inexpensive, quick and easy.
Putting the conditioner on and then the stain was fine. Awful, but fine. Wiping it off brought some fun swear words. The stain was not even and looked splotchy for two reasons. One was because I had let it sit too long before wiping it off. The other was significant glue stains from my hands that prevented the stain from penetrating.....in areas that couldn't be easily sanded. So the stain was extra thick and sticky in places where it was still wet, and too dry to wipe off in others and also had spots where the stain barely did anything. Screw this - toss it all in the fireplace.
I didn't do that. I would never put treated wood into my fireplace. I decided to get my sanding block and go crazy sanding the crap out of the whole thing. It took a lot of sandpaper because it kept getting full of the icky stain. The shelves ended up looking like worn farm-house style wood. It was not my intention, but my wife said liked it (I think she only said that so that I wouldn't feel bad about how they turned out. She's great like that).
Anyways, as mentioned earlier, I only have finished product pictures. I have taken enough pics in the next few projects to make up for the lack of photos on this one.
Total expense was a can of oil-based pre-stain conditioner, and a can of oil-based stain.


Comments
Post a Comment